A massing study answers "what shape should the building be?" before anyone draws a door. It is quick, because each option is only a few boxes, and it is useful, because the shape decides a lot that the rooms will later have to live with: how much garden is left, how deep the rooms are, how tall the house looks from the street and how much wall there is to build. The trap is comparing options that differ in too many ways at once. A study only teaches you something when the options hold the same brief.
What should stay fixed between options?
Hold these steady, and write them down before you start:
- The total floor area, measured the same way for every option. Use gross external area (to the outside face of the walls) at this stage; it is what a simple volume can measure.
- The storey height. Same floor-to-floor height, so a difference in overall height is a decision and not an accident.
- The site and its fixed edges: the plot, where the street is, where access comes in.
- The few brief items that drive shape, such as "bedrooms upstairs" or "living room opening to the garden".
Let everything else move: the outline, which storey is larger, where the building sits on the plot. If two options differ in area as well as shape, you cannot tell which change made one look better.
A worked example: three shapes, one brief
The brief: a two-storey house of about 150 m² gross on a 16 × 30 m plot (480 m²), street to the north, garden to the south. Floor to floor is 2.9 m, so with a 0.2 m floor zone each storey is 2.7 m clear and the top of the building's volume (the underside of its roof) is 5.6 m above the ground floor. All three options hold exactly 151.2 m².
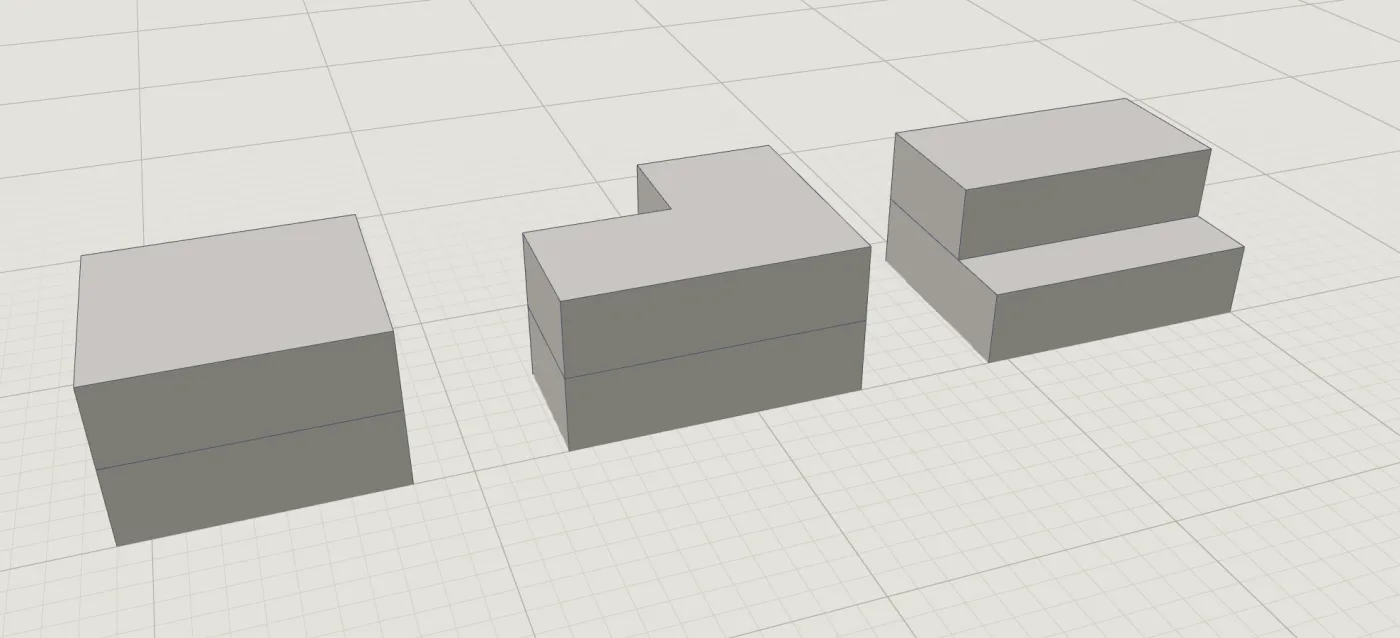
The measurements, side by side
| Measure | A · Compact block | B · L shape | C · Stepped upper floor |
|---|---|---|---|
| Plan | 9.0 × 8.4 m | 10.8 × 9.0 m, less a 5.4 × 4.0 m corner | 10.8 × 8.4 m; upper floor 10.8 × 5.6 m |
| Footprint | 75.6 m² | 75.6 m² | 90.7 m² |
| Gross external floor area (both storeys) | 151.2 m² | 151.2 m² | 151.2 m² |
| Outside wall area, floor to roof | 201.8 m² | 229.7 m² | 206.5 m² |
| Exposed roof and terrace area | 75.6 m² | 75.6 m² | 90.7 m² |
| Seen from the street | 9.0 m wide, 5.6 m high | 10.8 m wide, 5.6 m high | 10.8 m wide, 2.9 m high at the front; 5.6 m set 2.8 m back |
| Furthest point from an outside wall | 4.2 m | about 3.0 m | 4.2 m below, 2.8 m above |
| Inside area before partitions, 300 mm outside walls | 131.0 m² | 122.3 m² | 130.6 m² |
| Plot left unbuilt (of 480 m²) | 404.4 m² | 404.4 m² | 389.3 m² |
How these were measured: plans are to the outside face of the walls. Wall area is the perimeter of each storey times 2.9 m, with no parapet or roof edge. "Furthest point" is the largest distance any spot inside the outline can be from the nearest outside wall, a rough proxy for how deep the rooms will be. The plot and the 300 mm wall are assumptions for the comparison. None of this is a cost, energy or daylight calculation.
What each shape changes
A · The compact block: least wall, deepest plan
The rectangle holds 151.2 m² with the least outside wall (201.8 m²) and the most inside area once 300 mm walls are subtracted (131.0 m²). Less wall usually means less to build and less surface to lose heat through, which is why compact forms are the efficient default. The price is depth: a spot in the middle is 4.2 m from any outside wall, so the centre of the plan is where the stair, bathrooms and storage tend to end up. From the street it is the narrowest option but shows its full 5.6 m height along the whole front.
B · The L shape: shallower rooms, a sheltered corner, more wall
The L has the same footprint and area, but its two wings are only 5.0 and 5.4 m deep, so no point is much more than 3 m from an outside wall. That makes two-sided rooms and daylight from more than one direction easier to plan. The recess gives the garden a 5.4 × 4.0 m corner enclosed on two sides, which can feel private and sheltered depending on where the sun and wind come from. It costs about 14% more outside wall than the block (229.7 m²) and, because walls follow the longer perimeter, the least inside area before partitions (122.3 m²). From the street it is the widest full-height front.
C · The stepped upper floor: lower at the street, bigger footprint
Pulling the upper floor 2.8 m back from the street leaves a single-storey front about 2.9 m high, with the full 5.6 m height set behind it. People on the pavement see a lower building, which can matter where neighbouring houses are lower or the street is narrow. The ground floor has to grow to keep the area, so it takes the most plot (90.7 m²) and leaves the smallest garden. The step also adds an exposed flat area over the ground floor (30.2 m²), which must become either a roof or a terrace with guarding; it is not free space until that is designed.
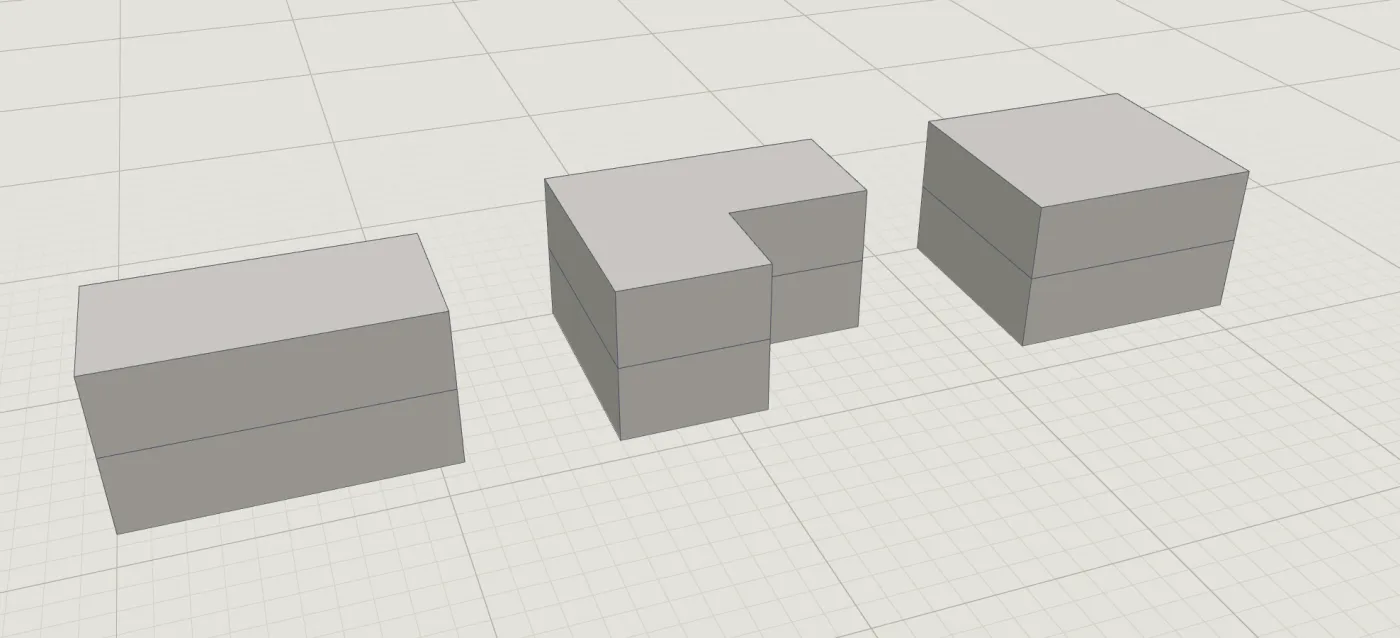
How to choose, and what to check next
There is no winning shape; there is a shape that suits this brief. A few rules of thumb:
- Cost and efficiency first? Prefer the option with the least outside wall and roof for the area. Here that is A.
- Rooms that need light from two sides, or a protected outdoor corner? A shallower plan like B gives that, and you pay for it in wall.
- A sensitive street or lower neighbours? Bring the height down where it is seen, as C does, and check what the extra footprint does to the garden.
- Two options close? Combine them rather than pick: an L whose street wing steps down is a fourth option worth one more sketch.
Then test the favourite against the rooms before you draw walls:
- Arrange the room list inside its footprint, storey by storey, and see whether the rooms fit their target areas. The fixed-footprint method does exactly that.
- Find a place for the stair that works on both floors. In a stepped or L-shaped plan the upper floor is smaller or split, which limits where it can land.
- Check the deepest rooms: a deep room with windows on one side only is the hardest to daylight, so give it a second outlook or make it shallower.
- Look at the shape in elevation from the neighbours' side, not only the street.
When a room layout fails, go back to the shape rather than forcing the rooms. That loop is the point of studying massing first: a box is cheaper to change than a wall.
Common mistakes
- Comparing different areas. A bigger option nearly always looks better inside; it is not a fair test of shape.
- Reading gross area as room area. Walls, partitions and the stair come off it. In the example, walls alone take 13 to 19% of the gross area before a single partition.
- Treating a sketch as an analysis. "Gets more sun" from a diagram is a hypothesis. Daylight, overheating and energy need their own checks, and local planning rules need the authority's own guidance.
- Polishing one option. Keep all three equally rough until one is clearly better.