Click Massing in the Drawing · Massing switch in the top bar. Pick Rectangle (R), click the first corner, type the width, press Tab, type the depth and press Enter. Then type the number of storeys and press Enter. Drawing, reshaping and creating drawings in Massing are part of Gridsnap Pro; opening Massing, looking around and trying the example are free.
Massing is for the question “what shape should the building be?” — footprints, storeys, setbacks and heights — before there are any walls. When a shape is settled, Create drawing… turns it into ordinary walls and floors in Drawing.
Open Massing
- In the editor’s top bar, click Massing in the Drawing · Massing switch. On a free plan it reads Massing PRO.
- The drawing region becomes the Massing workspace: MASSING TOOLS on the left, the 3D view in the middle, the inspector on the right.
- To go back, click Drawing in the same switch. Your drawing is exactly as you left it.
A link to https://editor.gridsnap.app/?massing=1 opens the editor straight
into Massing.
What is free and what is Pro
Free on every plan: opening Massing, orbiting and selecting, reading the inspector, the example, Finish in Drawing, and every ordinary Drawing edit.
Pro: the Rectangle, Polygon, Courtyard, Push/Pull and Façade tools, dragging or typing into a handle, changing heights, repeats, Create drawing… and Resume massing…. On a free plan these open the Gridsnap Pro offer instead, and nothing is changed.
Try an example in the inspector opens a two-storey house with a setback upper floor in a new tab, so you can look around it and select it without touching your own project.
Draw a footprint
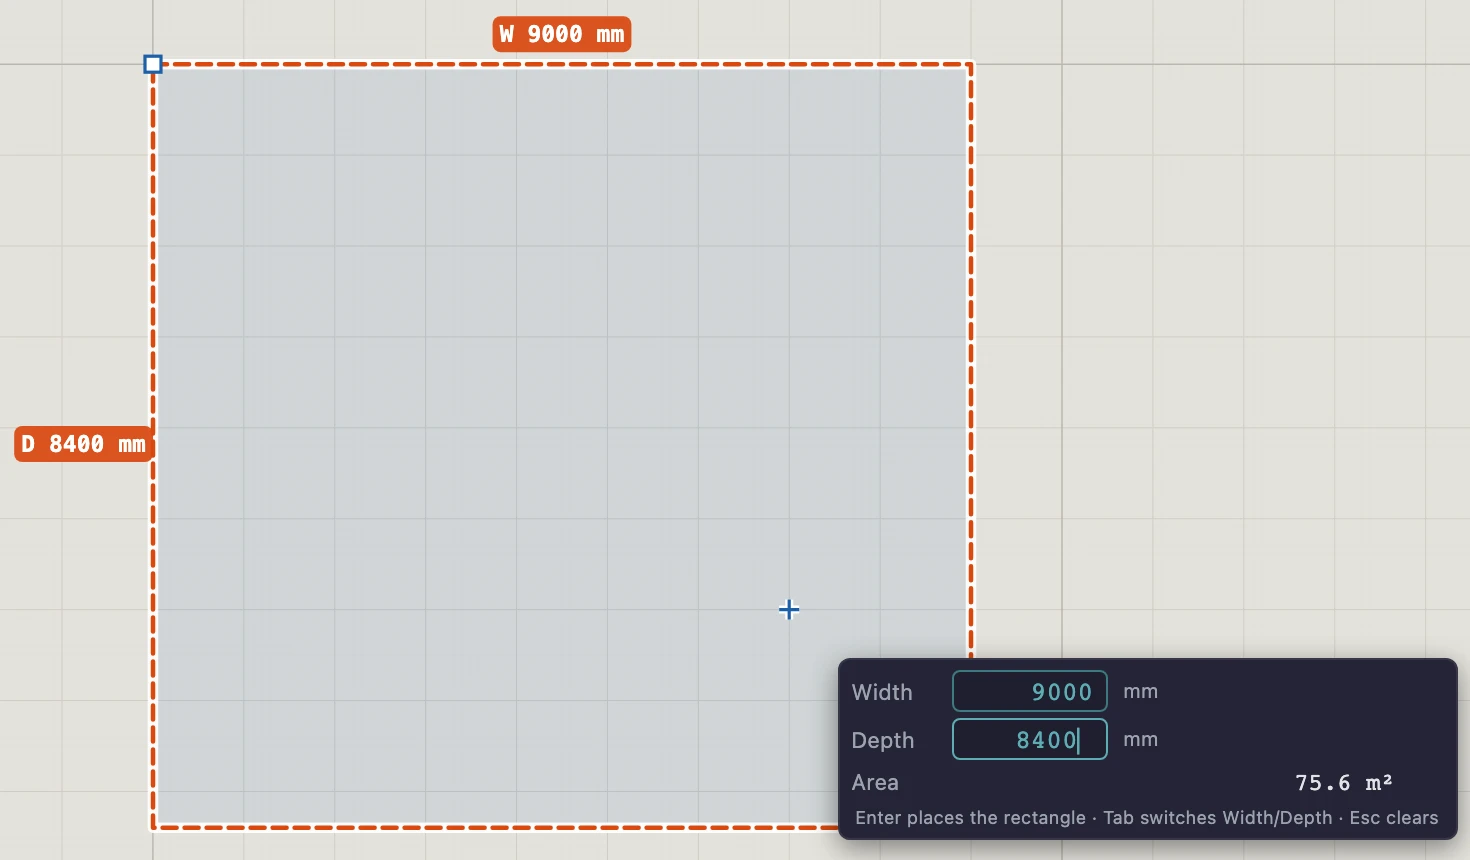
Rectangle (R):
- Click the first corner on the ground. To start at an exact offset, rest on an existing corner and type the distance.
- Type the width, press Tab, type the depth, press Enter. Or click the opposite corner.
- Type the number of storeys and press Enter.
Polygon (P) draws any straight-edged outline:
- Click the first corner.
- Point in the direction of the next edge, type its length and press Enter. Or click each corner.
- Close the shape by clicking the first corner, double-clicking, or pressing Enter with nothing typed. Backspace or ⌘Z takes the last corner back.
- Type the number of storeys and press Enter.
Draw in Top or Perspective. New storeys use New storeys, floor to floor from the inspector: 2900 mm unless you change it before drawing.
The outline is the outside face of the walls. When you later create the drawing, the walls are built inside it.
Move and reshape
Select first: click a form to select the building, click again for the storey below, or pick it in the Buildings list. With the whole building selected, a face arrow resizes that face on every storey, the disc moves the building and the top arrow pulls the top. With one storey selected, its face arrows move only that storey.
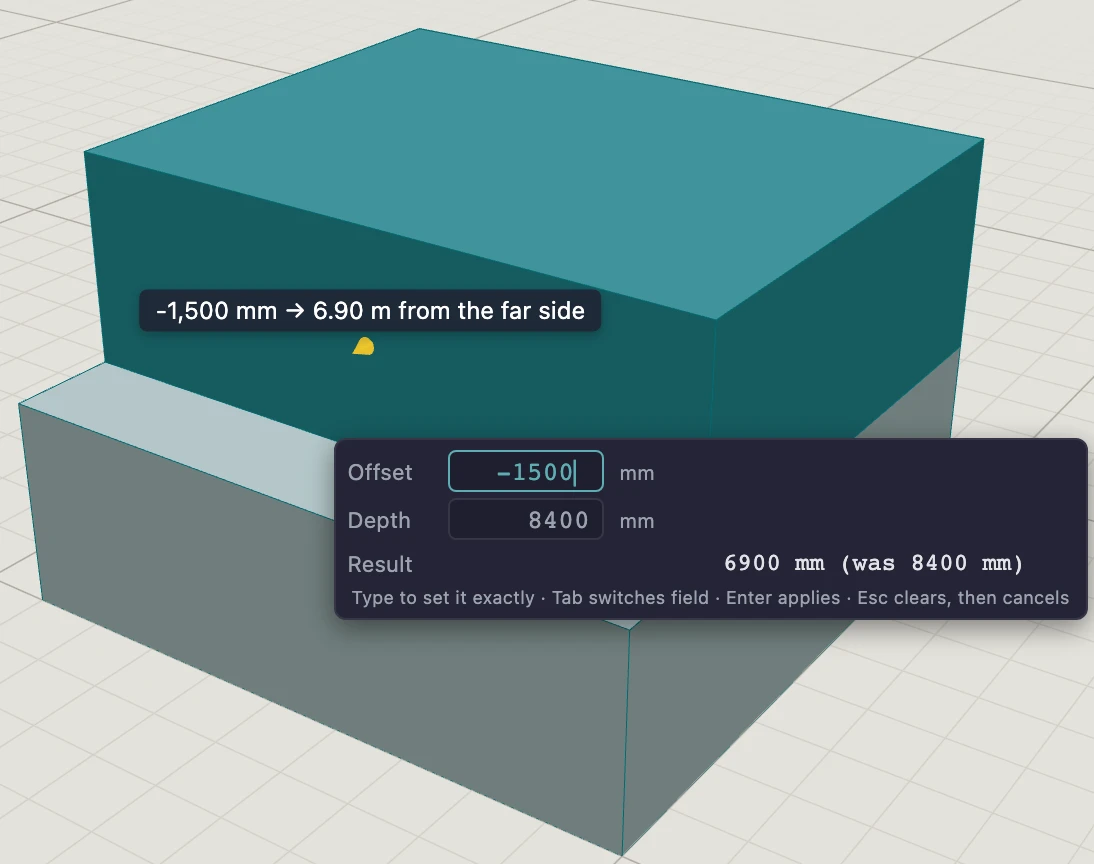
To move a face by an exact distance:
- Click its arrow (or drag it).
- Type the offset. Positive moves the face out, negative moves it in. The readout shows the result before you commit.
- Press Enter.
For only part of a face, use Push/Pull (U): point at a face of the selection, click where the portion starts and where it ends (or type From corner, then Length, pressing Enter after each), then move or type the offset and press Enter. That is how you make a recess, a projection or an L shape from a rectangle.
Storeys and heights
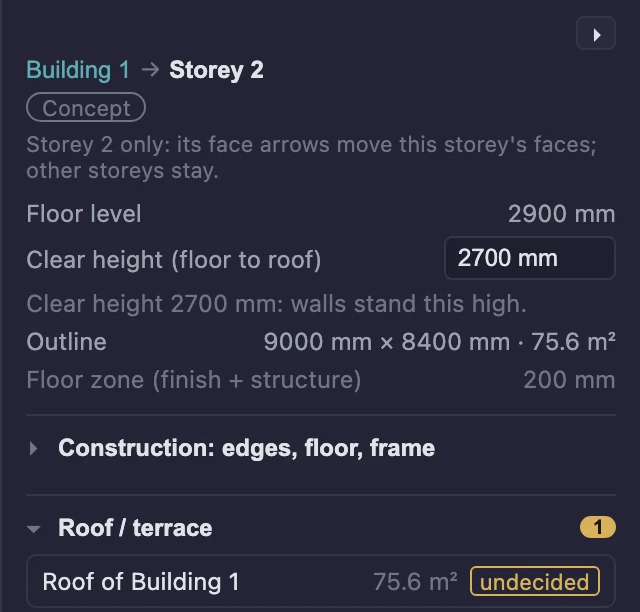
With the building selected, Storeys (top first) lists every storey. Add storey and Remove top change the count, and Pulling the top changes… decides whether dragging the top arrow adds storeys or changes the top storey’s height.
Select a storey to see its numbers. Three of them are easy to mix up:
| Field | What it is | What changing it does |
|---|---|---|
| Floor level | The storey’s finished floor level (FFL) above project zero | Shown; it follows from the storeys below |
| Floor to floor | From this storey’s finished floor to the next one’s | Moves every level above |
| Clear height (floor to roof) | On the top storey: from its floor to the underside of the roof | Changes only this building; no level moves |
| Floor zone (finish + structure) | The floor’s own thickness under the finished floor level | — |
Floor to floor = clear height + the next floor’s zone. The defaults are 2900 mm floor to floor, a 200 mm floor zone and so 2700 mm clear, which is the height the walls get when you create the drawing.
When a storey stands in separate pieces, each piece lists its own clear height, so one wing can be lower than the other.
Look around
The view buttons are Perspective, Top, Front, Back, Left and Right.
- Drag empty space to orbit in Perspective, or to pan in Top and the elevations.
- ⌥-drag or wheel-drag orbits with any tool armed, so you never have to switch to Select to turn the view.
- Right-drag pans. Scroll zooms. F frames every form.
Each tool shows a small guide in the lower left with its keys; close it with ×.
Cancel and undo
- Esc steps back through the tool’s current gesture, one step at a time.
- Undo and Redo at the bottom of the tool rail, or ⌘Z and ⇧⌘Z, step through finished changes. Each change is one step.
Next
- Turn the shape into a drawing, and keep editing freely.
- Repeat a sequence of storeys.
- Add windows and fins to a façade.
What this doesn’t do
- Curved or sloping forms. Outlines have straight edges and every storey is vertical; an exposed top becomes a flat roof, a roof terrace or stays open.
- Touch input. Use a mouse or trackpad and a keyboard.
- Massing does not know about rooms. To arrange rooms before walls, use Space Planning; the two are separate starting points and do not pass anything to each other.