Click the floors button in the top bar — it names the storey you are on — and pick Empty floor or Duplicate current walls. The new storey is added above the top one, becomes the active floor immediately, and shows the floor below as a ghost so you can line the upper walls up with the lower ones.
The menu
The button opens the whole stack: every storey, top of the building first, with its level against project zero (±0.00, +2.90, -2.60). Click one to make it active. The four ways to add a storey and the ghost picker are in the same menu, so floors are one control in the top bar however many the building has.
The four options
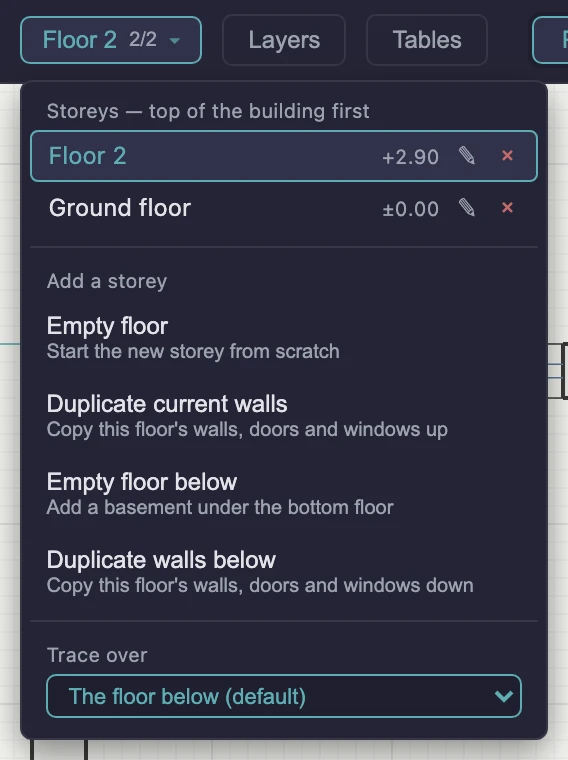
The menu offers:
| Option | What it does |
|---|---|
| Empty floor | Start the new storey from scratch |
| Duplicate current walls | Copy this floor’s walls, doors and windows up |
| Empty floor below | Add a basement under the bottom floor |
| Duplicate walls below | Copy this floor’s walls, doors and windows down |
Duplicate copies the walls, doors and windows — the structure. Furniture, stairs, dimensions, labels and areas are not copied, because an upper floor is laid out differently even when it sits on the same envelope. The copies are independent from the moment they are made: moving a wall upstairs does not move the one below it.
Where the new floor sits
The new storey’s level is worked out from the top floor: its level plus that floor’s wall height plus its slab thickness. It inherits the same wall height and slab thickness, and it is named Floor 2, Floor 3 and so on by the count of floors.
Click the ✎ on a row in the menu — or double-click the row — to rename that storey: “First floor”, “Loft”, “Attic”, whatever your drawing calls it. Renaming changes nothing else; the name is what appears on the button and in the sheet list when you export.
Tracing over the floor below
Trace over, at the bottom of the floors menu, controls the ghost:
- The floor below (the default) — traces the storey immediately underneath.
- Nothing — no ghost.
- <floor name> — trace over any other storey, including one above. A basement drawn under the ground floor wants exactly this.
The ghost shows walls and terraces, because a deck is part of the outline you are measuring against. It is a tracing aid only: you cannot select or edit anything through it.
Working across floors
- The floors menu switches the active floor, and PageUp / PageDown do it from the keyboard — a storey per press, the same two keys that climb a storey in the 3D walkthrough. Everything you draw, select, nudge or delete happens on the active floor only.
- Switching floors deliberately does not re-frame the camera. You change storey to look at the same place one level up; press F when you do want to re-frame.
- The 3D view shows the whole building at once by default. Clicking something in 3D that lives on another storey switches the active floor to it, so the panel and the keyboard act on what you just picked.
- Stairs on the lower floor cut the hole in the slab above them, and tall furniture and stairs from the floor below are drawn as dashed ghosts on the floor above.
Removing a floor
The × on a row in the floors menu deletes that storey and everything on it, after a confirmation. It is undoable with ⌘Z, and the last remaining floor cannot be deleted.
What this doesn’t do
- A step inside one storey is not a floor. Every floor is one flat level; a sunken living room or an entry landing is a slab zone drawn on the floor it belongs to — see split levels.
- Duplicating does not link. There is no “same as below” relationship — two storeys that must stay identical have to be edited twice.
- The new floor always goes on top, not above the floor you are looking at. If you are standing on the ground floor of a three-storey plan, Empty floor adds a fourth storey, not a mezzanine.