Press D for a door or N for a window, then click the wall where it goes. A preview slides along the wall as you move, so you can see the opening before you commit. A door then wants a second click: move the cursor to the side the door should open to and click again.
Doors
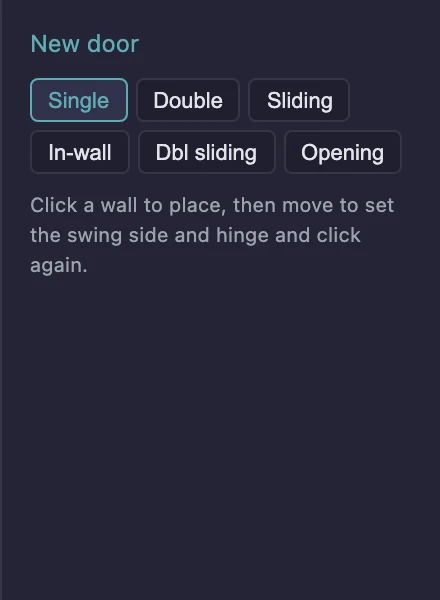
- Press D. The properties panel shows New door with six kinds to choose from: Single, Double, Sliding, In-wall, Dbl sliding, Opening.
- Move over a wall. The preview cannot hang off the end of the wall, and when you are within 100 mm of the right spot it snaps so the opening sits hard against a wall joining from the side — which is the position you almost always want next to a partition.
- Click to place it. The hint line reads “Move to set swing side and hinge · click to confirm · Esc to cancel”.
- Move the cursor: which side of the wall it is on picks the swing direction, and which half of the door it is nearer picks the hinge end. Click to confirm.
A cased opening (the Opening kind) is a doorway-shaped hole with no leaf and no swing, so it takes one click and stops there. Plan check still counts it as a way between two rooms.
Default door: 900 mm wide, 2100 mm high, with a 92 mm frame and a 40 mm leaf.
Windows
Press N and click the wall — one click, no orientation step. The default window is 1200 mm wide, with its bottom at 900 mm above the floor and its head at 2100 mm.
Changing one afterwards
Select it with V and the properties panel shows everything about it.
Doors — Width (300–3000 mm), Height, Variant, Leaf thickness, Frame depth, and where the leaf sits across the wall (Centred, Flush, swing side, Flush, other side). Three buttons flip things without re-drawing: Flip swing, Flip hinge, and for a sliding door Flip track side (which wall face the panel hangs on) and Flip slide side (which jamb it parks beyond). The plan symbol shows both: the panel sits on the track side, and its parked run is dashed past the slide-side jamb. There is a glazing section, and Open in 3D decides whether the leaf stands open in the 3D view.
Windows — Width, Window height, and Bottom above floor (the sill), with a small diagram showing what each one means. Panes sets the division: Auto, Full glass, Divided in 2, Divided in 3, Divided in 2 (horizontal), Divided in 4 (cross). Auto adds a centre mullion once the window is wider than 1.5 m. Cill switches the interior window board and the exterior weathering cill on or off — the ⚙ drawing settings set the default for the whole project, because that is a construction convention rather than a per-window decision.
A door in a wall that spans two levels gets one more row, Threshold: which floor the door is measured from, and whether a step down is generated on the low side. Split levels covers the three settings.
To move an opening along its wall, select it and drag; to remove it, select it and press Delete or Backspace.
Openings live on the wall, not on the drawing
A door or a window belongs to its host wall and holds a position along it, so moving or lengthening the wall carries its openings with it. Deleting a wall deletes the openings in it. If a wall was split into two by an earlier edit, the tool still treats the straight run as one wall and will fuse the pieces when an opening lands across the seam.
What this doesn’t do
- Openings must not overlap. Two openings that overlap by even a fraction of
a millimetre are an impossible detail, and in the 3D view the wall face breaks
visibly. The plan check flags it as
opening-overlapon the free tier for exactly that reason. Touching is fine; overlapping is not. - No bay, corner or curved windows. Windows are rectangular holes in one straight wall.
- The default sizes are drawing defaults, not standards. They are what a new opening starts at, and every one of them is editable. For what sizes are normal, see the reference pages.