A floor plan is a scaled, top-down drawing of a space: walls, doors, windows and rooms, with dimensions. You don't need CAD training to draw one — you need accurate measurements, a consistent scale, and a tool that keeps your lines straight. This guide walks through the whole process. The examples use Gridsnap, a free floor plan creator that runs in your browser with no sign up, but the method applies on paper too.
Step 1: Measure the space
Everything downstream depends on the measurements, so take them properly:
- Measure wall to wall at floor level, not along skirting boards or window sills — they stick out and will skew your plan.
- Work room by room and sketch each one roughly as you go, writing lengths directly on the sketch.
- Note every opening: for each door and window, record its width and its distance from the nearest corner.
- Record wall thickness where you can see it (door frames are the easiest place) — typically 100–150 mm for interior walls and 250–400 mm for exterior walls.
- A laser distance measure is faster and more accurate than a tape for anything over a couple of metres.
Already have an old plan or a sketch? You can skip re-measuring: Gridsnap's trace mode lets you import a photo or scan, calibrate its scale against one known length, and draw over it.
Step 2: Pick a scale and units
On paper, you'd choose a scale first — commonly 1:50 (1 cm on paper = 50 cm in reality) for single rooms or 1:100 for a whole home. In an online editor this decision moves to the end: you draw in real-world dimensions (millimetres in Gridsnap, or feet and inches with the drawing set to imperial) and choose the print scale at export time. Either way, know your target sheet: a typical house fits on A4 at 1:100 and on A3 at 1:50; imperial mode exports on Letter, Tabloid and ARCH sheets at the architect's scales.
Step 3: Draw the exterior walls first
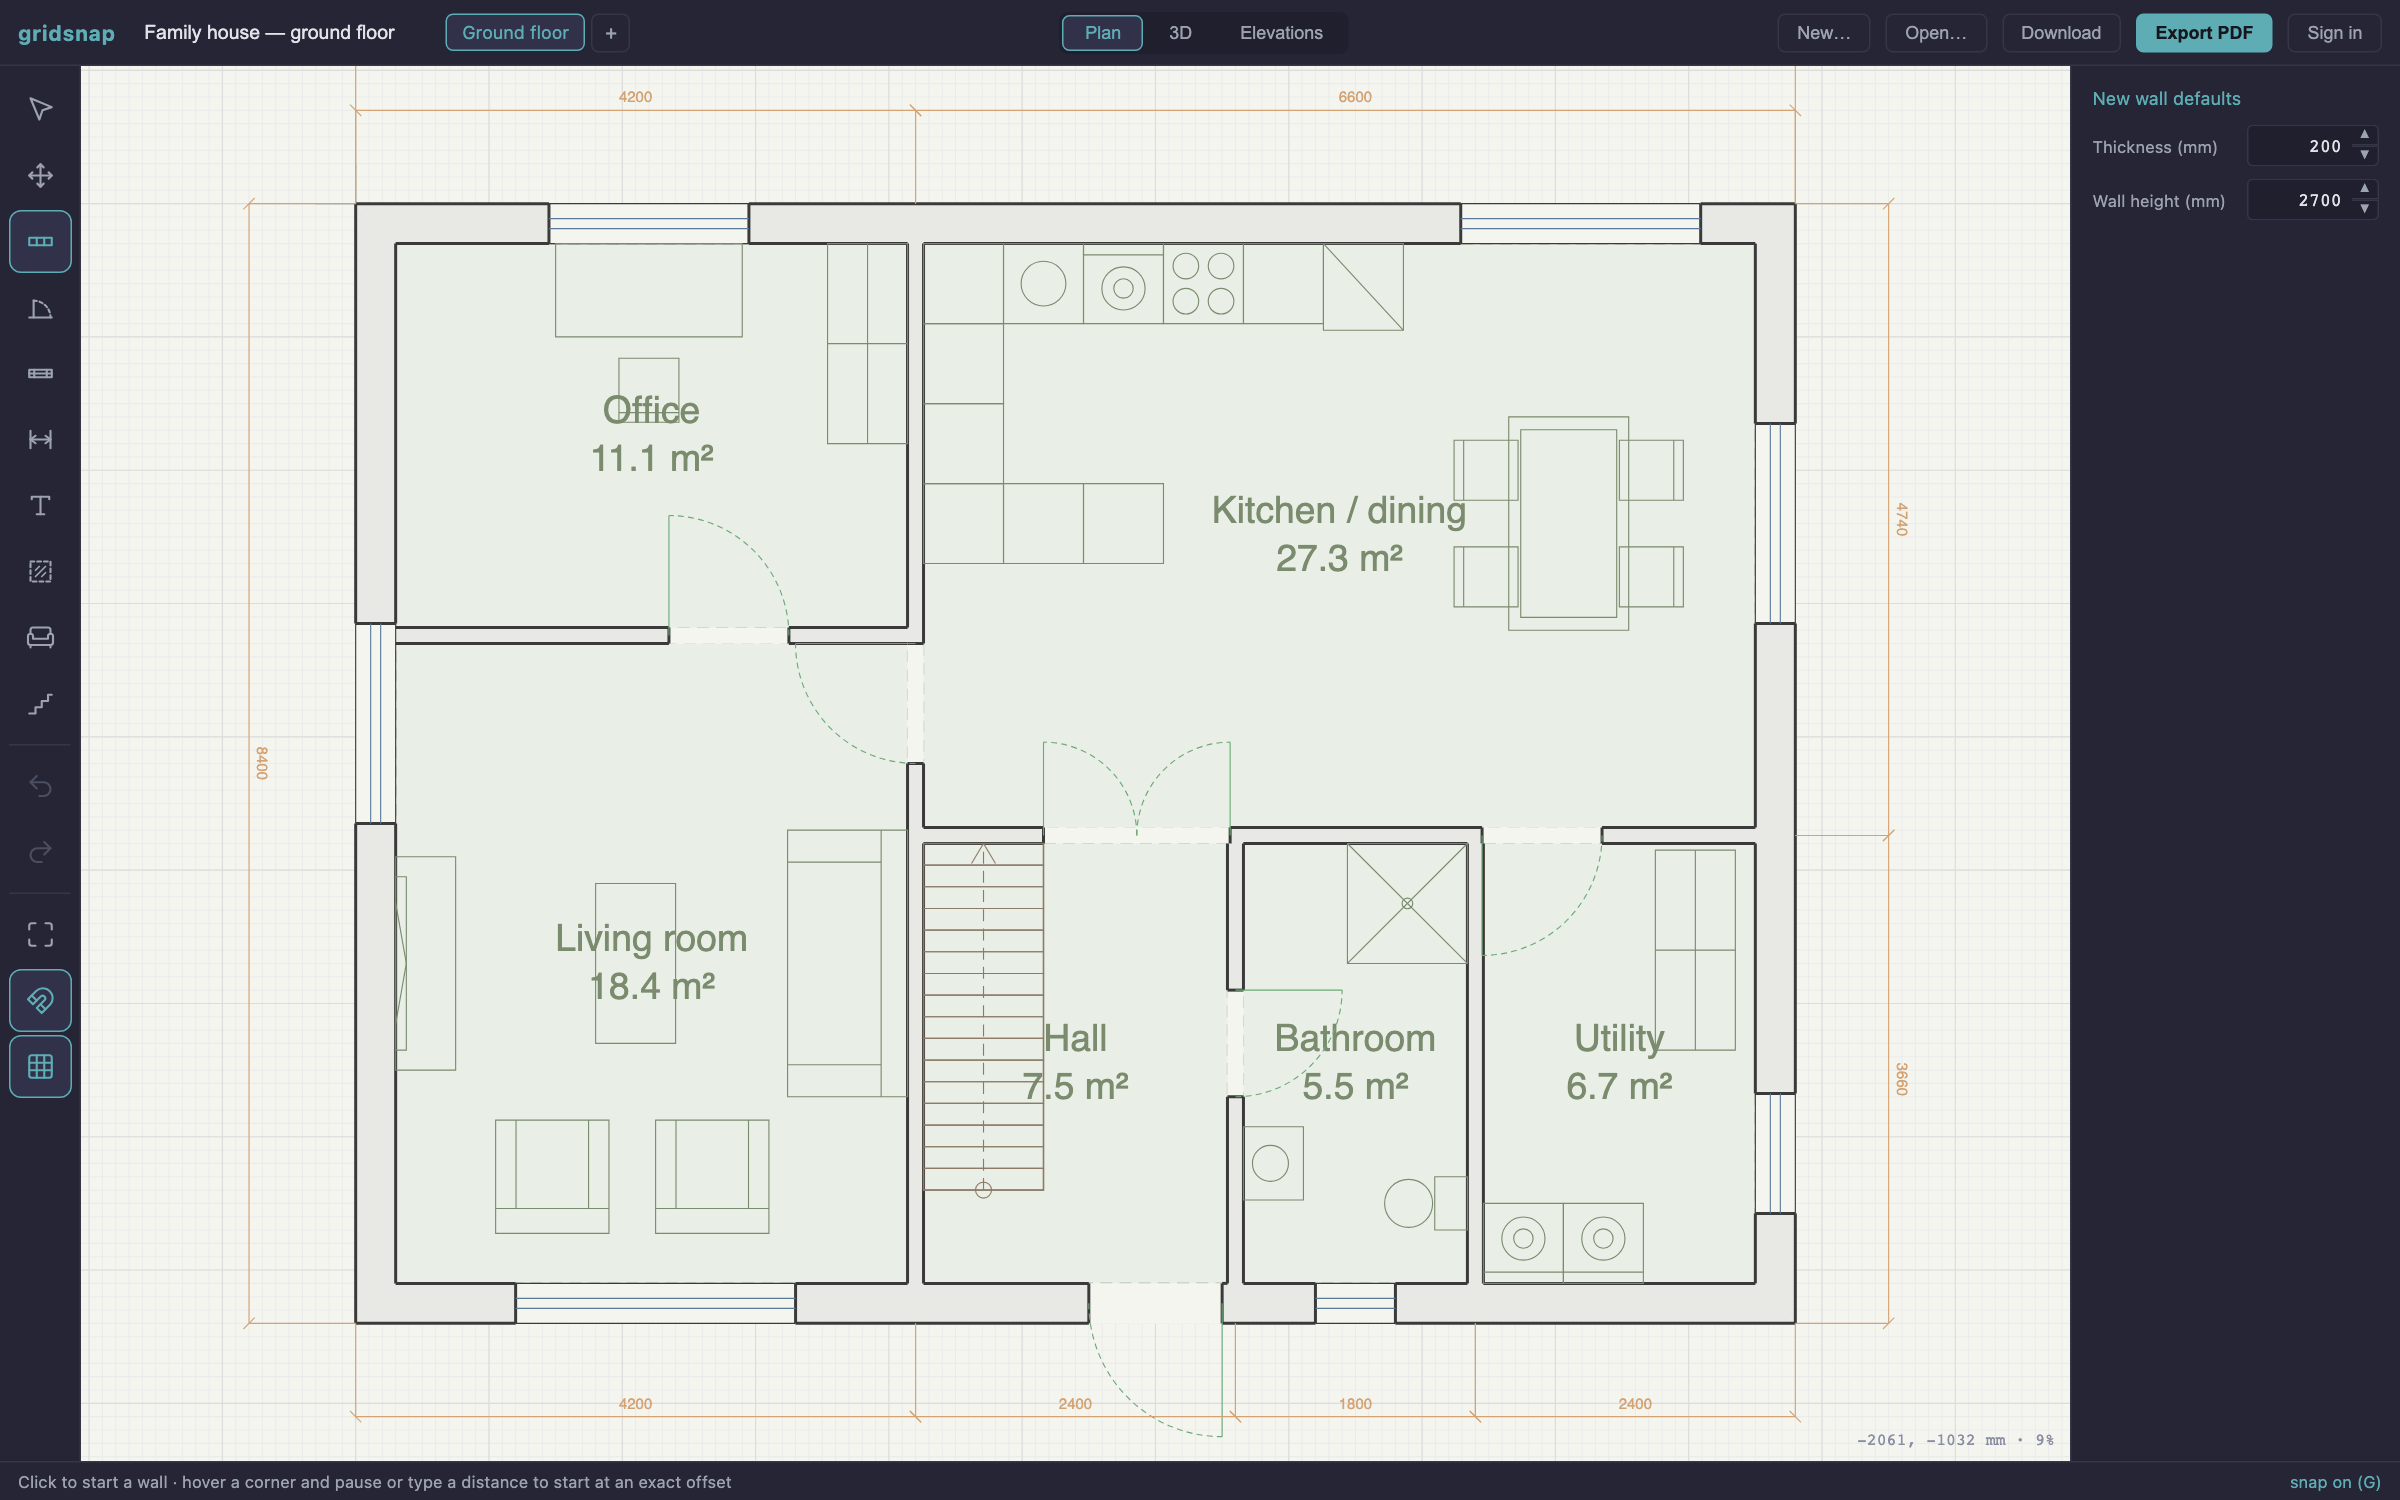
Start with the outline of the building, not the interior. In Gridsnap: click where a wall starts, type the exact length, press Tab to enter an angle if you need one, and hit Enter — the wall lands at exactly that dimension. Work your way around the perimeter until the outline closes; the snap engine catches the starting corner so the loop closes perfectly.
If you're planning a new build from lot dimensions rather than measuring an existing space, do the same thing in reverse: draw the buildable rectangle first (say, 15 × 9 m, or 50 × 30 ft with the drawing set to feet-inches), then design inside it.
Step 4: Add interior walls
Interior walls are all about position: a wall usually starts at a known offset from a corner ("the bathroom wall is 600 mm from this corner"). On paper you'd measure and mark that offset; in Gridsnap you hover the corner to acquire it as a reference point, type the offset, and start the wall exactly there. Keep walls orthogonal unless the building genuinely has angles — casually drawn walls are automatically straightened.
Draw walls at their real thickness rather than as lines — rooms are measured between the internal wall faces, so thin-line walls overstate every room. Which thickness for which wall (400 mm external, 250 load-bearing, 120 partition, and where those numbers come from) is the wall thickness guide.
Step 5: Place doors and windows
Doors and windows live inside walls, so don't draw them as separate lines. Place a door on a wall and it cuts its own opening; the swing arc — the quarter-circle showing which way the door opens — is drawn for you, no protractor or compass needed. Use your measured corner-to-opening distances to position each one, and pick the right type: single, double or sliding. Windows snap flush into the wall the same way.
Check door swings early. A door should open against a wall, not into the walking path or against furniture. It's the most common mistake on amateur plans — and the cheapest one to fix while it's still a drawing.
Step 6: Stairs and additional floors
If your building has more than one storey, finish the ground floor first, then add floors above — or below, for a basement. Stairs in Gridsnap are parametric: choose straight, L-shaped or U-shaped, and the stairwell opening is cut automatically in the floor above. While drawing an upper floor, a ghost of the floor below shows through so you can line up walls and stack the staircase in the same position.
Step 7: Label rooms and add dimensions
A plan without dimensions is a sketch. Add a dimension chain along each façade and any internal measurement a builder would need. In Gridsnap, dimensions anchor to the geometry — corners, door jambs, window jambs — and update automatically when you move a wall. Rooms are detected from the walls with one click and labelled with their net floor area in m², measured to the inner wall faces the way a surveyor would.
Step 8: Test the furniture fit
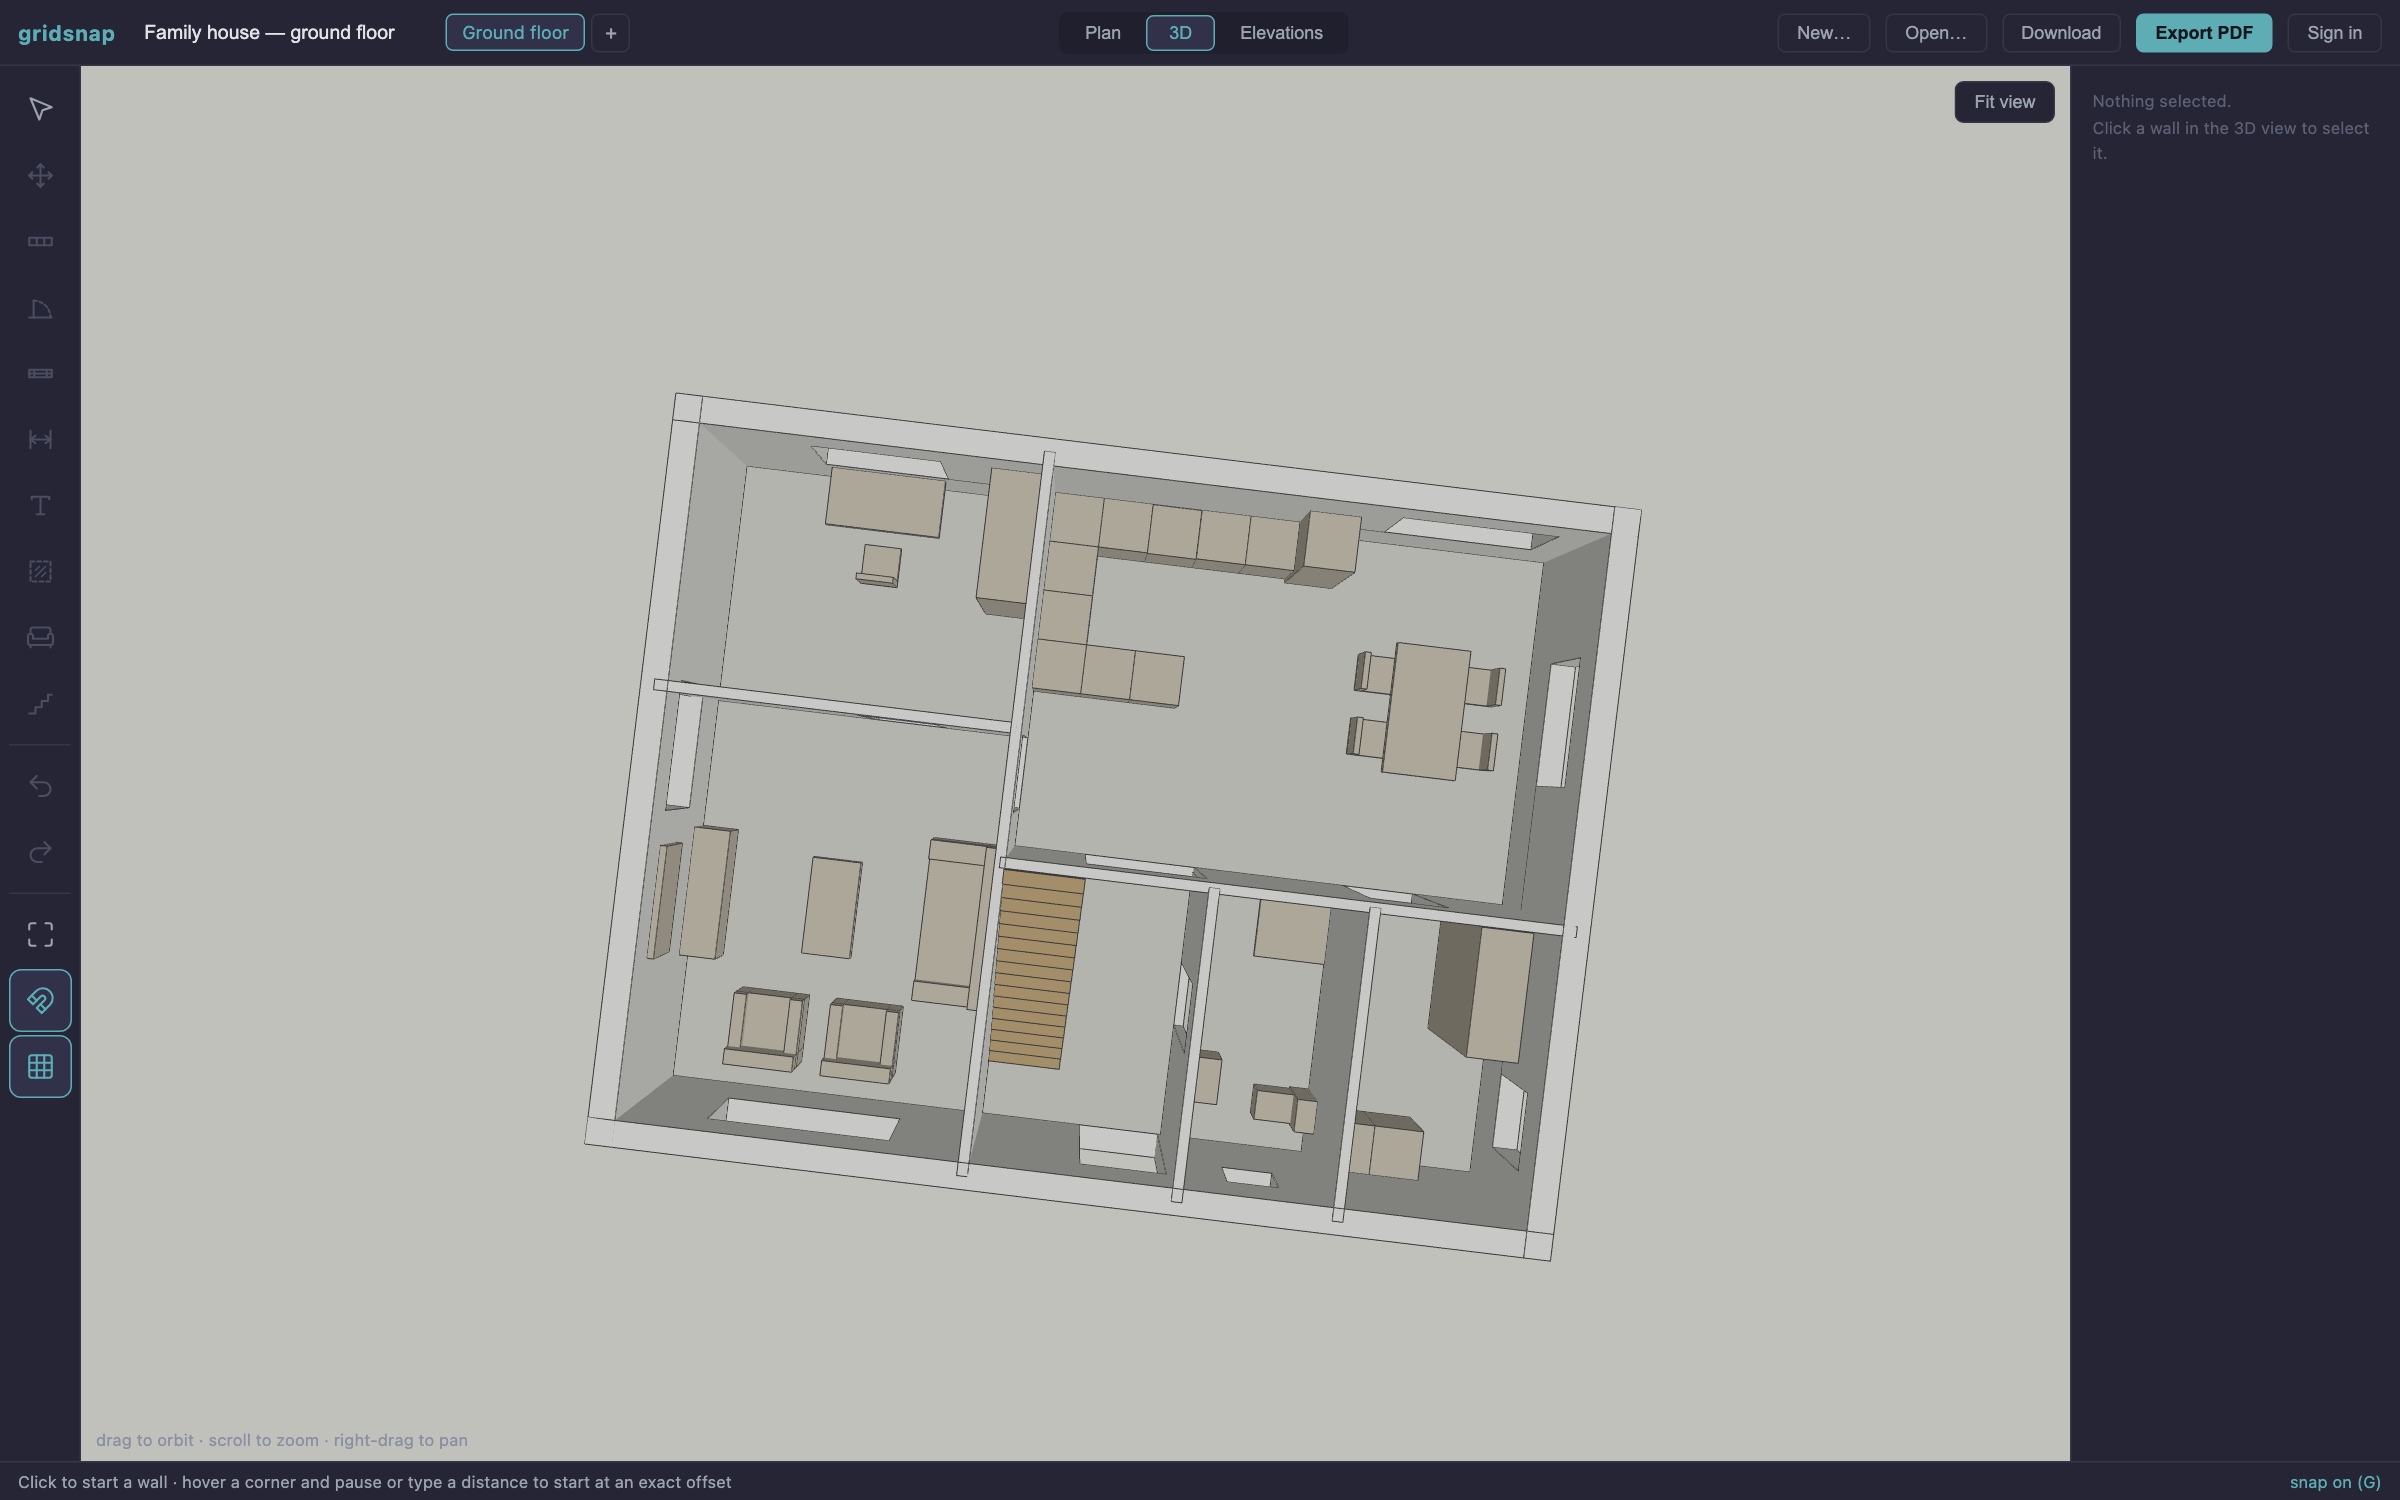
Furniture turns a technical drawing into a layout you can evaluate: does the bed leave room to walk? Does the sofa block the door swing? Use real dimensions, ideally of the pieces you own or plan to buy. A double bed is roughly 1600 × 2000 mm and a sofa seat about 900 mm deep. Then draw the routes between the doors and check that nothing stands on them: a gap that measures enough can still be the wrong place to walk. How to plan a furniture layout works through one room arranged two ways, and the room sizes & clearances cheat sheet lists the standard sizes and the empty floor you have to leave around each of them.
In Gridsnap this is the Furnish activity. The catalogue is parametric, so every item resizes to exact dimensions, and items that belong against a wall snap flush to it.
Step 9: Decide the finishes and how to show them (optional)
A plan for building only needs walls, openings and dimensions. A plan for deciding how a room will look also needs its materials: the floor, the walls and the larger furniture. Choose the surfaces that cover the most area first, and keep strong colours to one or two accents; how to choose finishes that work together covers the method.
Keep the two purposes apart on paper too. A measured drawing for a builder stays plain, with linework, symbols and dimensions. A presentation plan can show each floor finish at its real size, with a legend that names each finish. In Gridsnap the Finishes activity gives floors, wall faces and furniture parts a finish, and the plan's Textured style shows them; the Technical style is the same drawing without them.
Step 10: Choose the output for the reader
Pick the output by who will use it:
- Someone measuring from it (a builder, a kitchen fitter, a planning officer): a vector PDF at a standard scale, 1:50, 1:100 or 1:200 on A4 to A2. It prints true to scale, measurable with a scale ruler, with a title block, scale bar and room schedule.
- Someone drawing on from it (an architect or engineer): a layered DWG or DXF that opens in AutoCAD and ArchiCAD.
- Someone deciding how it will look: a Textured plan as PDF or PNG with a finish legend, plus a finish schedule. In a Textured PDF the lines and text stay vector and only the material fills are images, so it still measures like the plain sheet.
- A quick share in a chat or email: a PNG, or an overhead render of a furnished storey. The render is a presentation image, not a scaled drawing, and its PDF sheet says so.
All of these exports are free in Gridsnap, and none needs an account.
Step 11: Check the layout, not just the drawing
An accurate drawing can still describe a house that is unpleasant to live in. Before you send it anywhere, walk the plan in your head: can you get from the front door to every room without passing through another? Does every door have clear floor on both sides — including the side you always forget, the inside? Is there a window in every room you'd sit in, and enough of it? Can two people be in the kitchen at once?
Gridsnap's plan check runs as you draw. The basic checks, such as overlapping furniture, furniture inside a wall and openings cutting into each other, are free on every plan. With Gridsnap Pro it also measures circulation, door swings and clearances, daylight, kitchen and bathroom practice and room minimums, and marks the spot with the number of millimetres involved. It is much cheaper to move a partition now than to discover the problem when the room exists. None of these checks is a building-regulations approval.
Common mistakes to avoid
- Ignoring wall thickness. Drawing walls as thin lines makes rooms look bigger than they are — a 4 m room loses ~300 mm to the walls around it.
- Measuring over skirting and sills instead of wall face to wall face.
- No dimensions. If someone has to measure your drawing with a ruler and guess the scale, it won't survive contact with a builder.
- Doors drawn without swing arcs — you won't spot collisions between doors, walls and furniture.
- Forgetting what's above and below — stairs need an opening in the floor above, and load-bearing walls should stack.
Start drawing
That's the whole method: measure carefully, draw the shell, work inward, dimension everything, print to scale. The Gridsnap editor is free, runs in your browser, and needs no account — your plan stays on your device. Rather not start from an empty grid? Open one of the free floor plan templates and edit it instead, or, with Gridsnap Pro, describe the home in a sentence and compare generated room layouts before building one into walls. Prefer the pen-and-paper route first? See our companion guide on drawing floor plans on graph paper.