Everything a layout is made from is edited in one place: Rooms & requirements, opened from the Layouts stage. It has four sections — Rooms, Connections & privacy, Layout preferences and Area & footprint. Editing them is free, and the same list drives Spaces you draw by hand. Arranging layouts from it again with Update layouts is part of Gridsnap Pro.
Add rooms
- Press Add room in the Rooms section.
- Choose a Type (Kitchen / living, Bedroom, Bathroom, Hall…). The type fills in a starting name and a suggested size.
- Set the Quantity: two bedrooms become two separate rooms, Bedroom 1 and Bedroom 2. Up to 50 at a time.
- Set the Priority: Required, Preferred or Optional.
- Optional: change How the size is meant, type a Target area each and a Minimum width. You can set sizes later.
- Press Add.
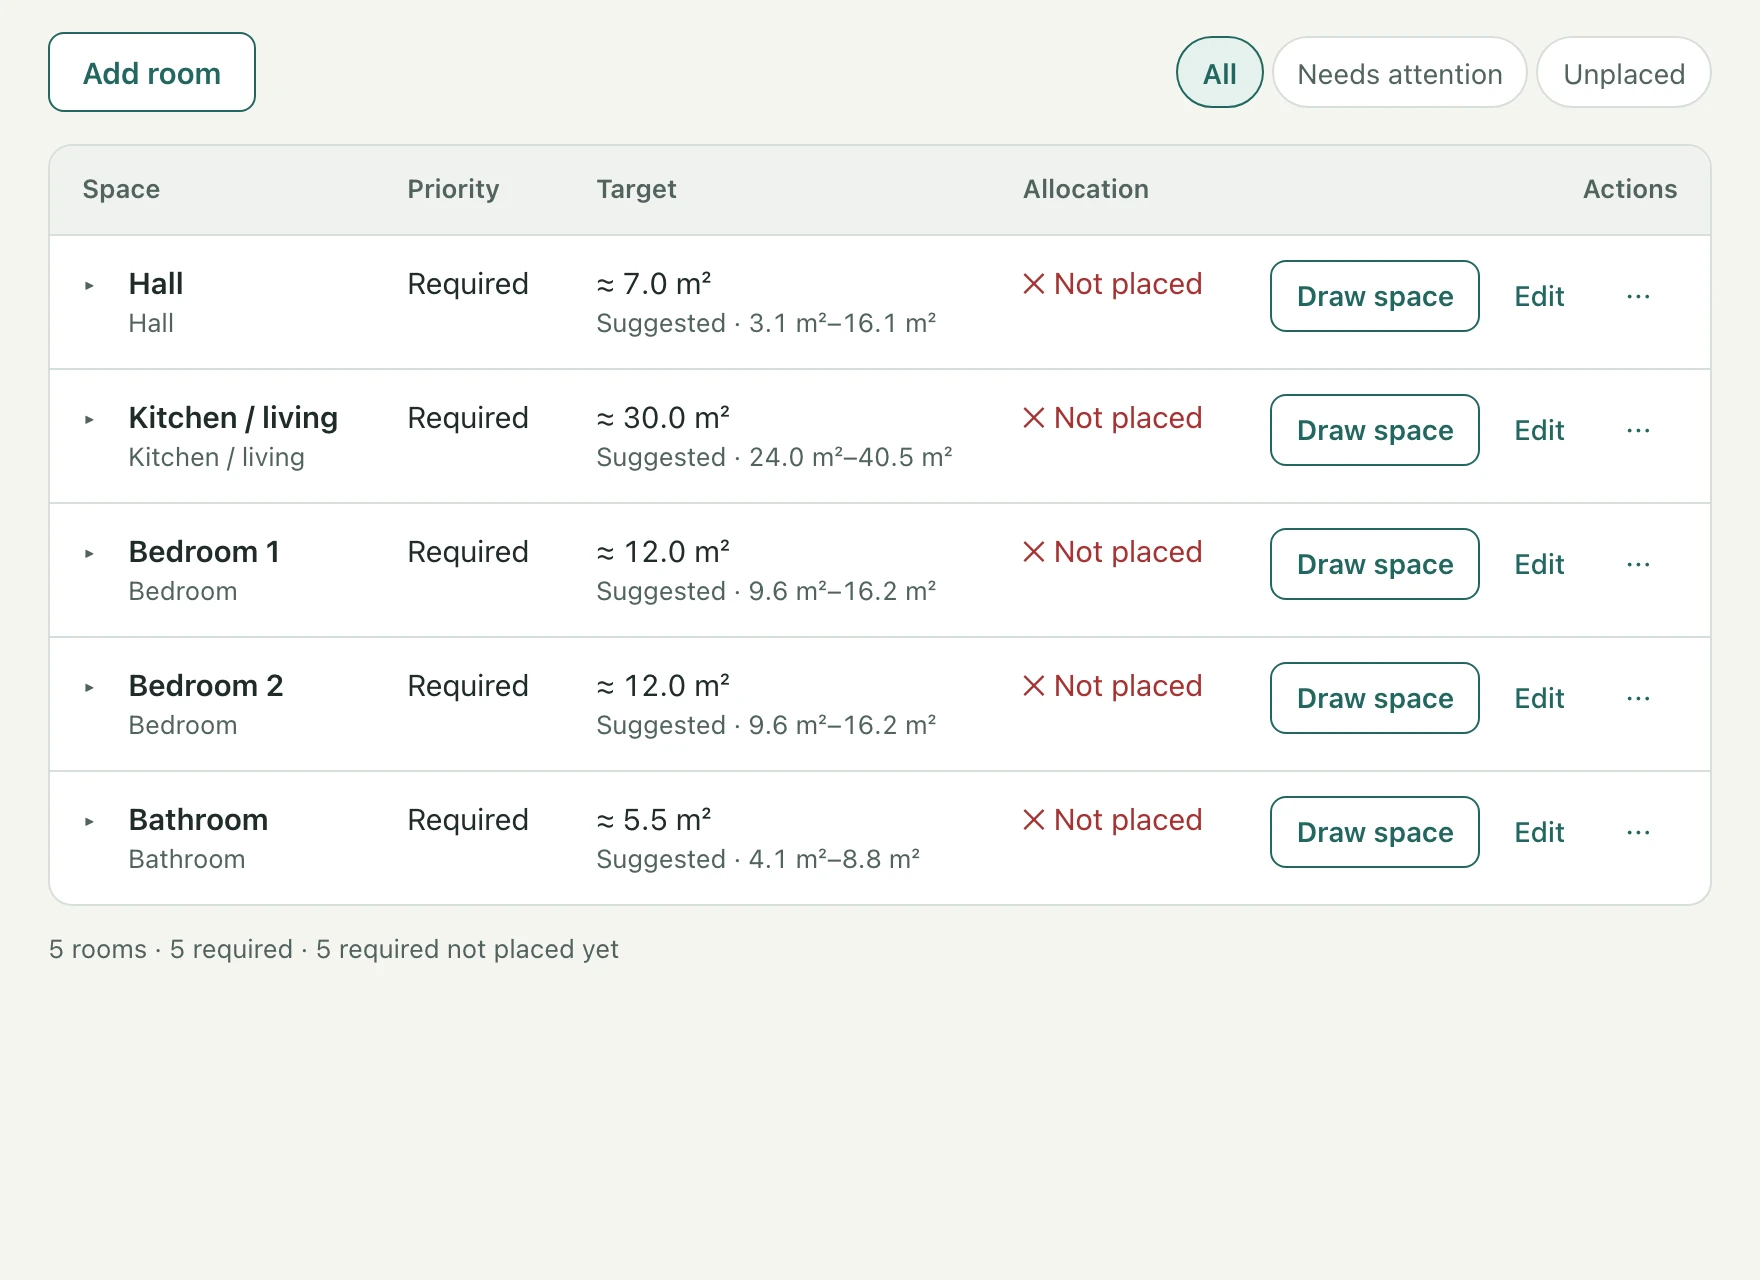
Each row shows the size and where the room is: ✕ Not placed, then In draft · Ground floor once a Space is drawn or a layout is used. Type suggestions are editable starting values, not regulatory limits.
How a size is meant
A room’s size can mean different things, and the two places that read it treat it differently:
| How the size is meant | Layout search (Pro) | Space program panel |
|---|---|---|
| Suggested — flexible (the type’s starting size) | Within the type’s working range, shown on the row — for a Bedroom about 9.6–16.2 m² around a 12.0 m² suggestion. A hall’s range is wide, because it is sized by what it serves. | Within target range anywhere inside that working range |
| Target (±20 %) — a size you chose | Within 20 % of it | Within target range only within ±5 %; otherwise Below target or Above target |
| At least, At most, Between | The bound is kept exactly | Judged against the bound |
The ±5 % reading is advisory: it tells you how a Space you drew compares, and blocks nothing. Typing a new figure into a suggested size makes it your target. Minimum width is checked only on rectangular Spaces; any other shape reads Width not checked for this shape — review manually.
Connect rooms and set the entrance
Open Connections & privacy.
- Choose the Entrance space: the room people enter through. With one hall in the list, it is suggested.
- Gridsnap suggests starting connections from the room types, such as each bedroom off the hall. Tick the ones you want and press Add the selected.
- For anything else, press Add connection and choose a Relationship: Connect (direct access), Share a wall (no door implied), Near, Separate or Outside edge.
A Connect has a Passage: Door, Opening (no door) or Open (no wall). A shared wall is never a door. Under Layout intent, Add private zone names rooms that should form their own wing, apart from the shared rooms, and Add kitchen location asks for the kitchen zone to sit within a distance of the wet rooms, measured from the counter. Both are checked on the 2D plan only; neither is a privacy or plumbing assessment.
A room has no way in
When a room cannot be reached from the entrance, the top of Rooms and Connections & privacy says so, for example Study has no way in yet. Beside it: Opens from [a room] as [door] Connect. Gridsnap picks the most likely room; change it if you like and press Connect. The same prompt appears on the Layouts stage when this stops a search.
Layout preferences
This section is used only when layouts are generated:
- Your layout idea — at most one, prepared from your description or from Get layout ideas from your brief (a separate Pro request, 5 credits). Use this idea is on by default; turn it off to search without it.
- Rooms that may be left out — tick Preferred or Optional rooms the search may also try without. The full list is always tried first. A room that is left out stays in your list as Not placed.
Area and footprint
Total area is an optional figure for the whole home: choose Stay under this area or Aim for this area, and whether it is the Room area or the Whole building, including walls. Layouts are compared with it.
Footprint limits the outline a generated layout may take:
- Flexible — no size limit; the outline comes from the arrangement.
- Within dimensions — a maximum Outside width (east–west) and Outside depth (north–south), measured to the outside of the outer walls. Choosing it fills in a suggestion from your room sizes, which you can change. It is a maximum, not a promise that the layout fills a rectangle.
Street side (optional) turns the entrance towards one side of the plan.
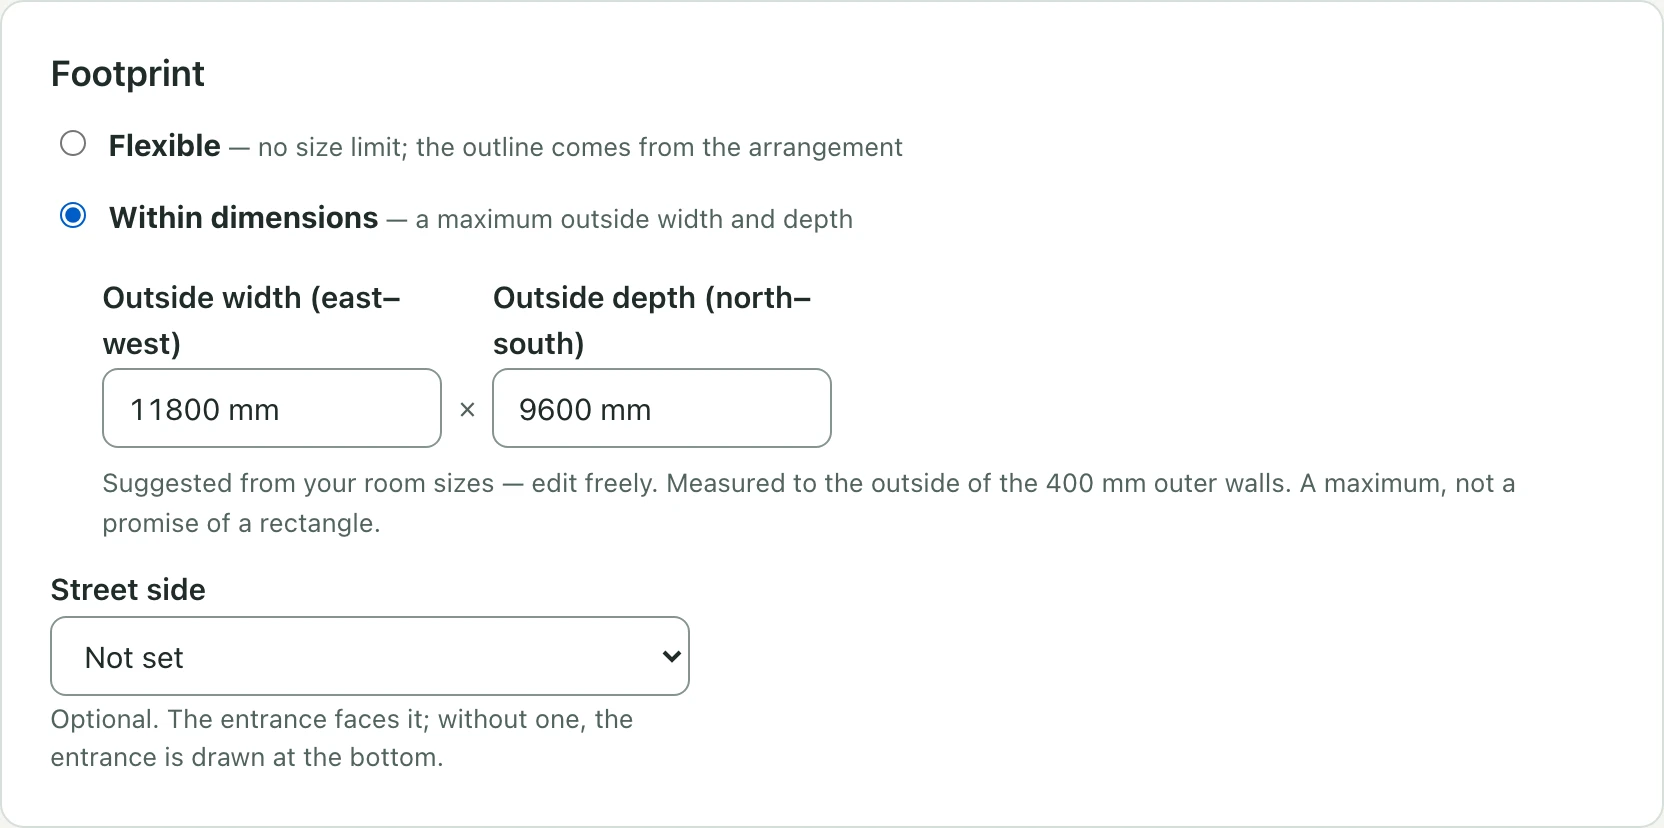
The footprint limit applies only to generated layouts. A planning envelope you draw on the plan is a different thing: it is measured to the inside of the exterior walls and reports unassigned area while you arrange Spaces by hand. See Draw an envelope. Generated layouts do not read a drawn envelope.
Save or update your changes
Edits in the drawer are kept together until you press a button at the foot:
- Update layouts (Pro) — saves every edit as one undo step and arranges layouts again. It uses no credits.
- Save (free plan) — keeps the edits so you can draw the rooms in Develop. Generate layouts · Pro beside it saves them too, then opens the offer.
- Cancel, ✕ or Escape — drops only what you changed in the drawer.
Spaces you have already drawn
A Space and a room in the list are linked only when you say so; nothing is matched by name. Use existing spaces in the Space program panel turns unlinked Spaces into rooms built from their own name, type and size. One Space can be linked from its properties: Program requirement → Link to requirement…. Unlink keeps the values and the shape.
Removing a room from the list asks first and leaves its Space on the plan. Copying a Space gives an unlinked copy.
A project with a saved exact rectangle
A project planned with an earlier version of Gridsnap may carry a fixed rectangle measured to the inside of the outer walls. Layouts are no longer arranged inside one. The rectangle and any draft made with it stay as they were, editable and buildable. Before new layouts are generated, Gridsnap asks once how to size them:
- Use as size limit — the inside size plus two outer walls, shown before you choose, becomes a Within dimensions maximum. For example 10 × 7.4 m inside with 400 mm walls is 10.8 × 8.2 m outside.
- Flexible — no size limit.
Either choice is one undo step and keeps the rectangle with the project.