A finish scheme is a named record of the finishes in this project: each room’s floor, wall finish, accent walls and Bathroom preset, the finish areas, walls with their own finish, floors, furniture, doors, windows and stairs, and the project defaults. Save one, try something else, and you can compare the two or put the saved finishes back in one step.
A scheme is not a room kit. A kit is a set of materials you can use in any room of any project. A scheme names this project’s own rooms and objects, is saved inside the project file, and travels with it.
Save a scheme (Pro)
In the Finishes activity, under Finish schemes, click Save finish scheme…. Name it and choose what it covers:
- The whole project: every storey, plus the project defaults.
- Chosen rooms: the rooms you tick on the current storey, with their finish areas, the walls around them, the doors and windows in those walls, and the furniture standing in them.
What will be saved lists it before you save. Each item is saved as it is now, including the ones with no finish of their own, so applying the scheme later also clears choices you made afterwards. No geometry is saved. Saving is one step you can undo, and the scheme is stored in the project, so it is in the file you download, in the cloud copy and in a design option made from the project.
To replace a scheme with the finishes you have now, open it and choose Update from current finishes….
Preview it on the project (Pro)
Open a scheme and click Preview on the project. The review lists:
- Changes: each finish the scheme would change, with what it is now (“was Oak herringbone”). A finish you changed by hand after applying a scheme is listed here like any other.
- Preserves: what already matches, and what the scheme does not cover, such as rooms or furniture added after it was saved.
- Skips: anything the scheme names that is no longer in the project, such as a deleted item or a storey that has gone, with the reason.
- Needs your choice: a room that has been split, merged or resized since the scheme was saved. Gridsnap does not guess which room it is now and never matches rooms by name. Choose the room that should receive its finishes (the one standing where it stood is marked) or skip it. Apply waits until each is answered.
While the review is open the plan shows the Textured style. Current and Scheme switch the plan and the 3D view between the two at the same camera. View from puts the 3D camera on one of your saved views. Nothing changes until you click Apply, which is one step you can undo.
Compare side by side (Pro)
Compare side by side… in the review shows the current finishes and the scheme as two plans at the same scale, Textured or Technical, with a table of the finishes that differ, room by room. When only finishes differ, it says the geometry and areas are the same. Nothing is saved, and no costs are estimated.
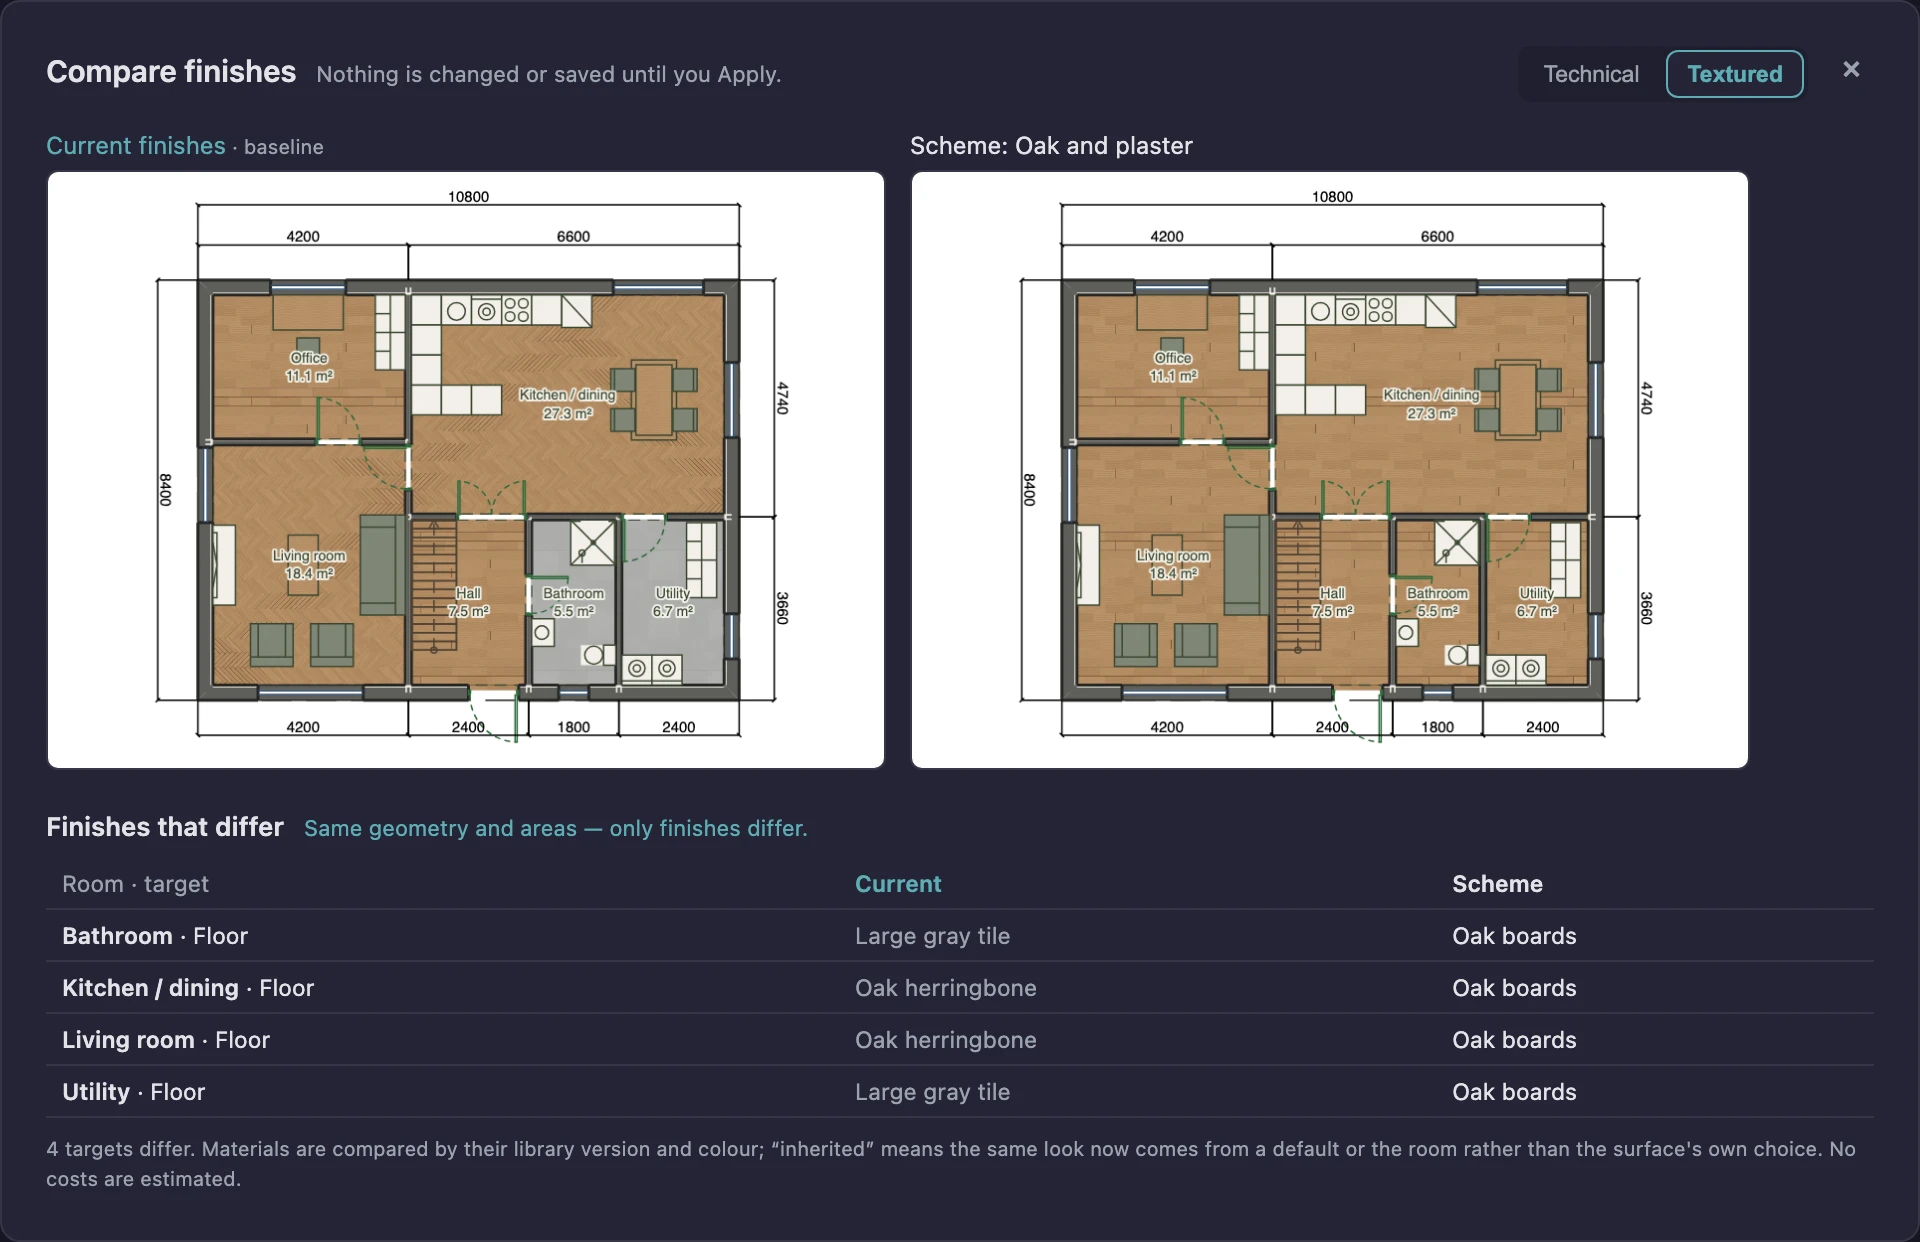
To keep the scheme’s finishes as a separate design to come back to, choose Save the proposal as a design option… in the review. This creates a new design option with those finishes and leaves the current one as it is.
Without Pro
Looking at a saved scheme, renaming it and deleting it are free, and so is finishing rooms one material at a time. If your Pro access ends, your schemes stay in the project. Saving, updating, previewing, applying and comparing need Pro again.
Good to know
- A scheme is not linked to the project: changing a finish later does not change the scheme, and applying a scheme does not keep the rooms in step with it afterwards.
- It never creates or deletes finish areas, and it never changes a wall face that follows a Massing façade.
- A project can hold up to 20 schemes.
- A project file with a finish scheme needs this version of Gridsnap to open.
Next
Room kits to finish rooms with a coordinated set of materials, and design options to compare layouts as well as finishes.