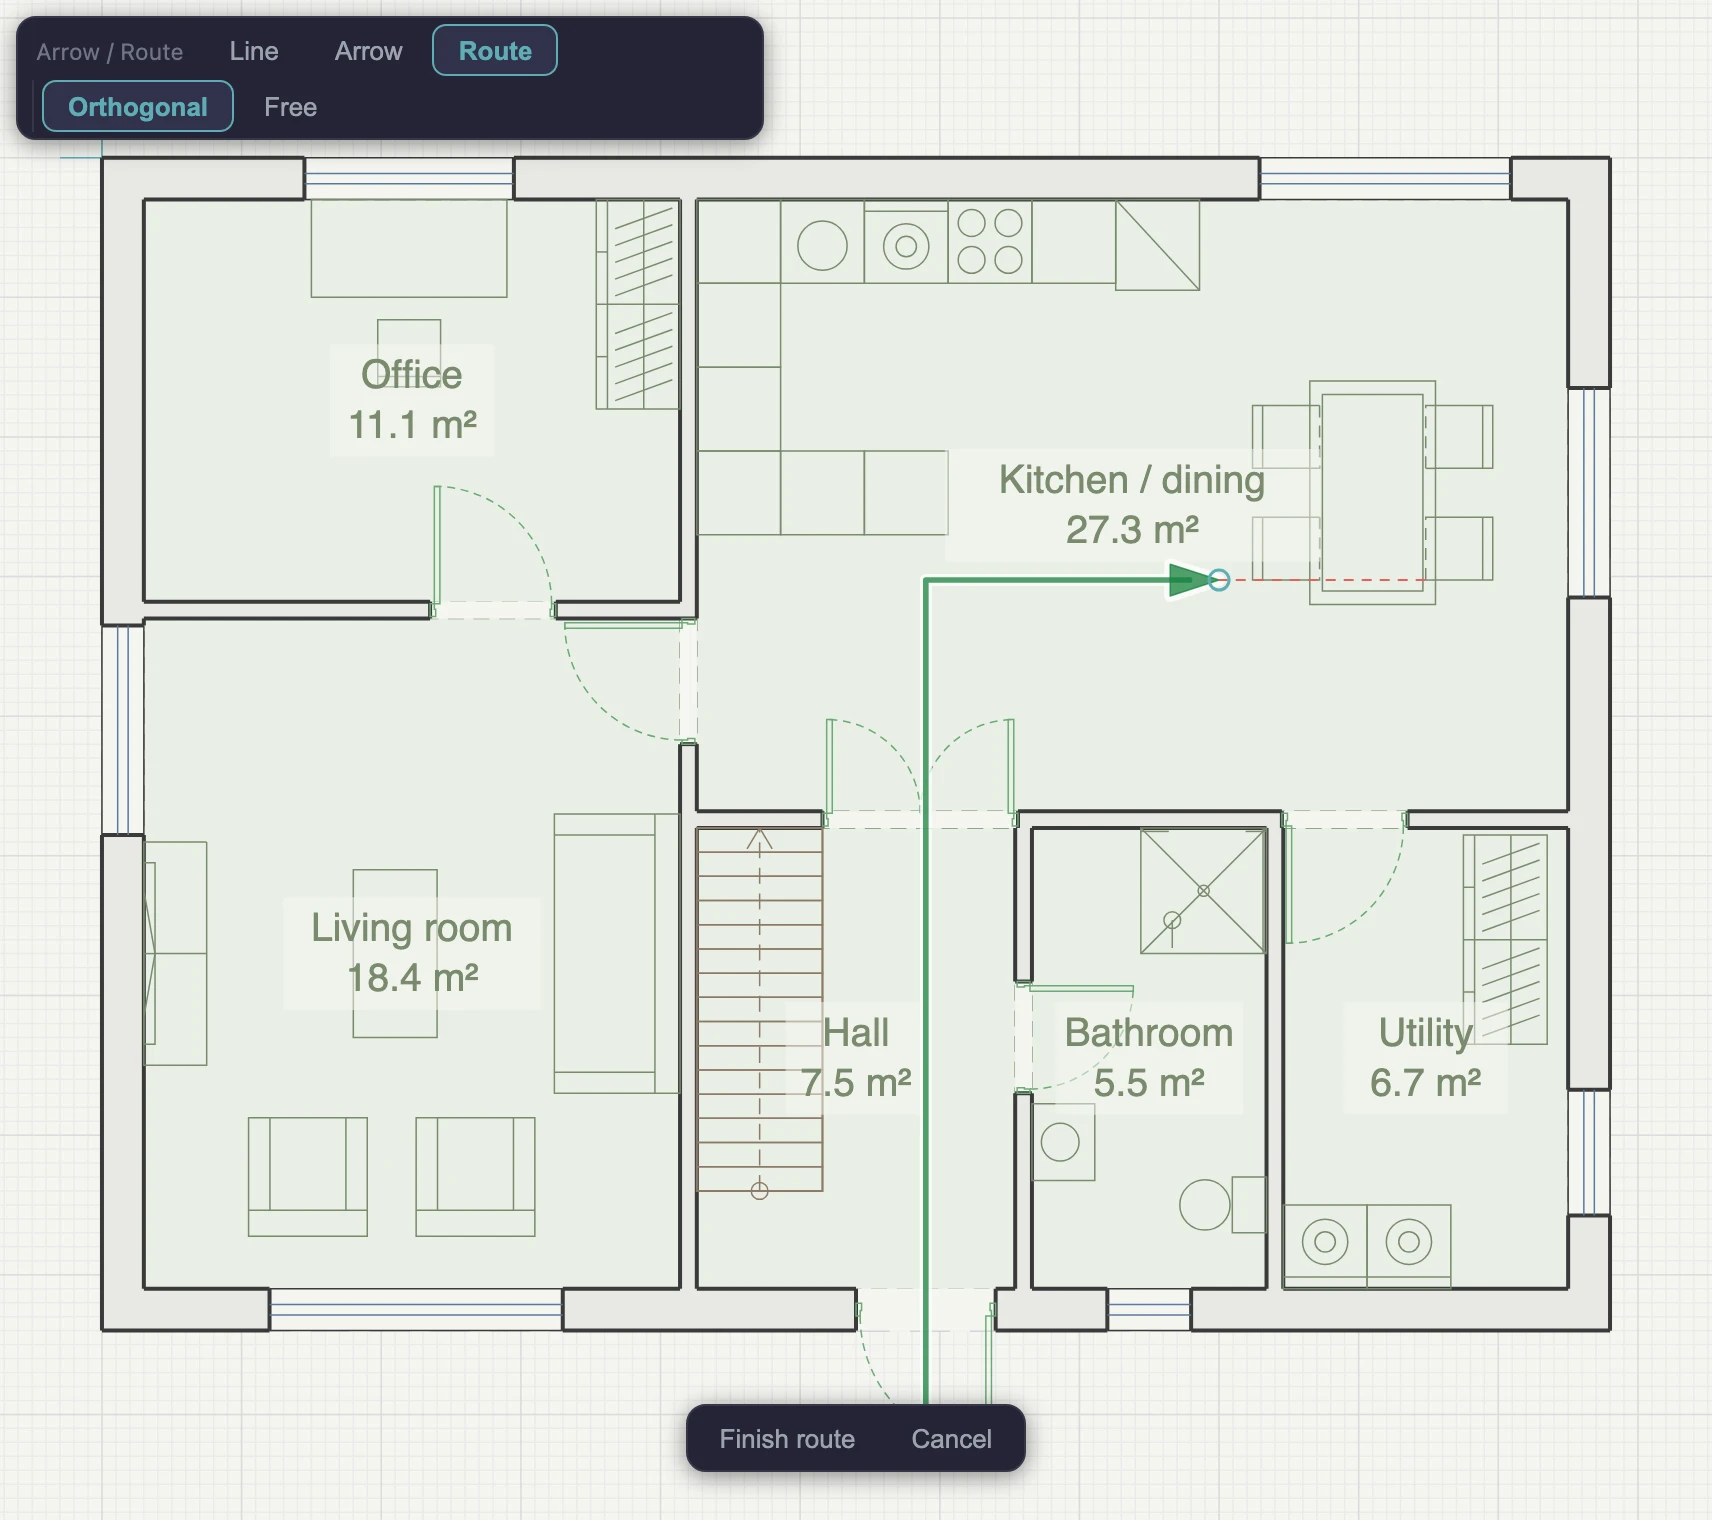
Choose Arrow / Route under Annotations in the toolbox, then Line, Arrow or Route in the bar above the plan. A line or an arrow is two clicks: the start, then the end. A route takes a click at the start and at each turn, and finishes with Enter or a double-click.
Draw a route
- Choose Route in the bar above the plan.
- Choose Orthogonal to keep every turn square, or Free for any angle. With Orthogonal on, hold Alt to free one point.
- Click the start, then each turn. Backspace takes the last point back.
- Press Enter or double-click to finish. Esc cancels.
Finish route and Cancel appear at the bottom of the plan view while a route is being drawn, which is how you finish on a touch screen. Finish stays greyed out until the route has its second point.
A new route starts as an evacuation route
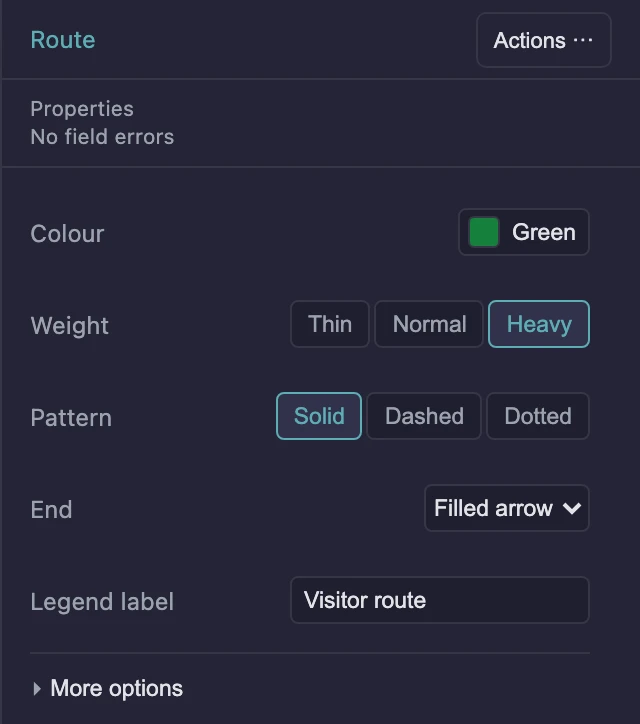
A new route is heavy and green, with a filled arrow and a white outline, and its Legend label reads “Evacuation route”. That label puts it in the legend. For a different kind of route, such as a visitor’s walk, change the label and the colour.
Under More options, Preset switches between Evacuation, Alternative (the same green, dashed) and Custom. Changing any part of a preset route’s style makes it Custom. These presets are styles only. Gridsnap does not check a route against any rule.
Change how a path looks
Select it, or set these before you draw:
| Field | Where | Options |
|---|---|---|
| Colour | Panel | A swatch, a hex value or the default ink |
| Weight | Panel | Thin, Normal, Heavy |
| Pattern | Panel | Solid, Dashed, Dotted |
| End | Panel, arrows and routes | None, Open arrow, Filled arrow, Dot |
| Legend label | Panel, routes | Text for the legend; leave empty to stay out of it |
| Start, Head size | More options | The head at the first point, and its size |
| Direction markers | More options, routes | End only or Along route, with a Marker spacing |
| White outline | More options, routes | Keeps a route readable over a busy plan |
Reverse direction, also under More options, swaps a path’s start and end.
Edit the points
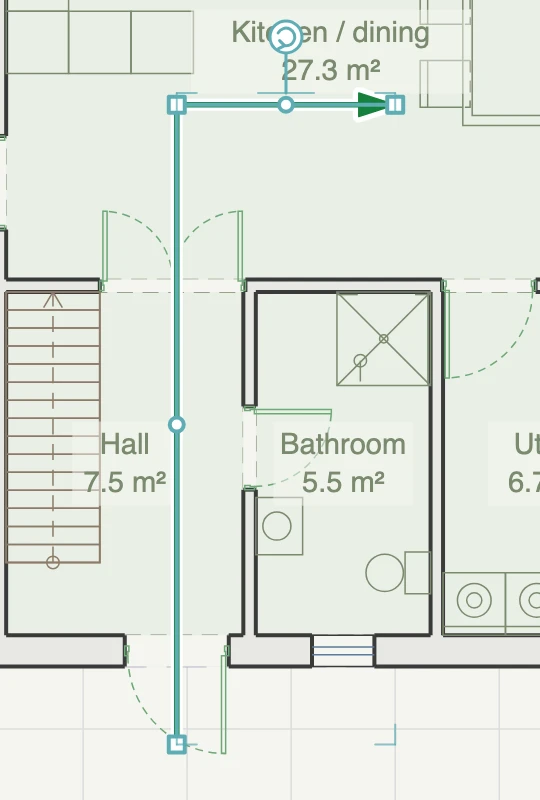
Select the path, then:
- Move a point: drag it.
- Add a point: drag the small round handle between two points.
- Remove a point: hold Option (Alt on Windows) and click it. Points that can be removed turn red while you hold the key. A path keeps at least two points.
On a touch screen, use More options ▸ Point ▸ Remove.
What this doesn’t do
- A route does not follow walls or find a way through the plan. You place every turn.
- A route does not measure travel distance.
- A route is not attached to walls. Move a wall and the route stays where it was.