Choose Callout under Annotations in the toolbox, click what the callout points at, click where the text goes, type the note and press Apply. The leader always stops at the edge of the text box, so it never crosses the words.
Bend the leader
Tick Elbow in the panel before you start. The click after the target then places the bend, and the next click places the text.
On a callout that is already placed, tick or untick Elbow in the panel, or Option-click (Alt-click on Windows) the elbow to straighten the leader.
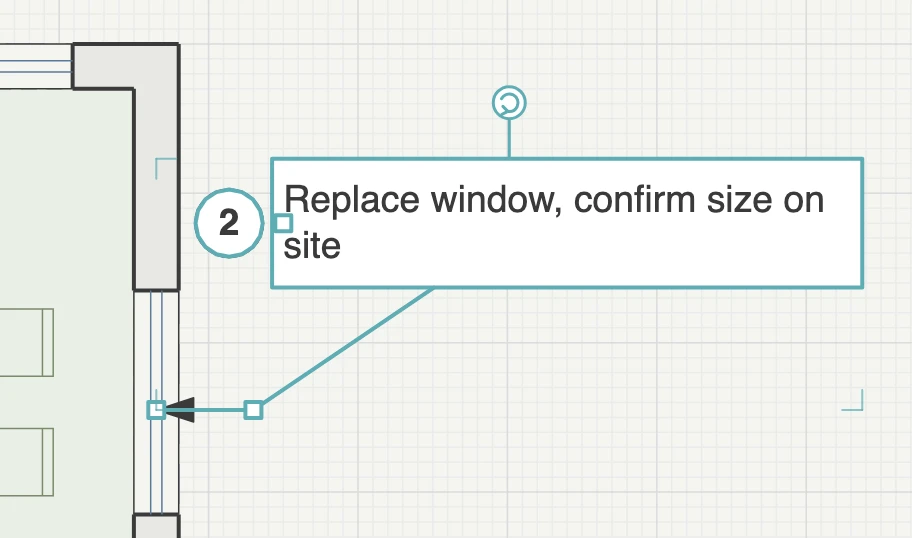
Edit a callout
A selected callout shows handles for its target, its elbow and its text. Drag one to move that part alone. The panel has:
- Text, Size, Text height, Style and Colour, as for a text note.
- Badge: None, Number or Letter, with the value you type.
Under More options are the Wrap width, the box’s Background, and the Leader colour, Leader weight, Leader pattern and Arrowhead.
What this doesn’t do
- A callout is not attached to walls or furniture. Move the furniture and the callout stays where it was.
- Badges do not number themselves. You type each one.
- A callout never becomes a legend row. Use a numbered marker if you want a keyed list.